Wednesday, 4 November 2015

My DIY Block Design by Mr. 8!

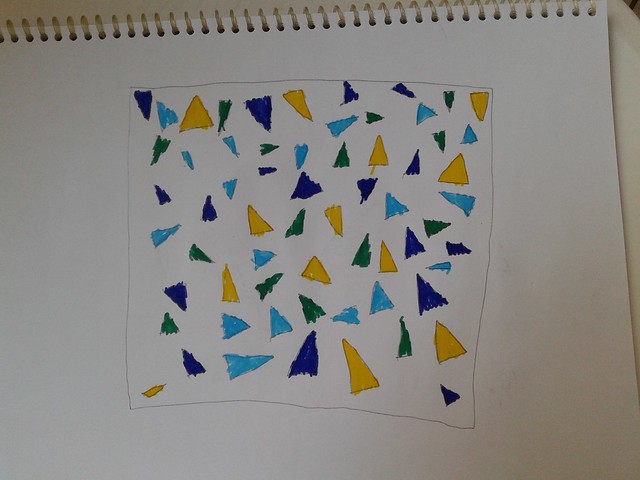
Hi! I want to tell you about the quilt block that I designed. I wanted to make a mini quilt for my big brother. I know that he likes triangles so first I drew the quilt design in my book.

20151014_101445

Then I chose the fabrics from my Mum's scraps box. She didn't have many greens, but there was just enough! I cut squares of the fabric and ironed it onto some 'Heat and Bond' paper so that it stuck.

20151014_101150

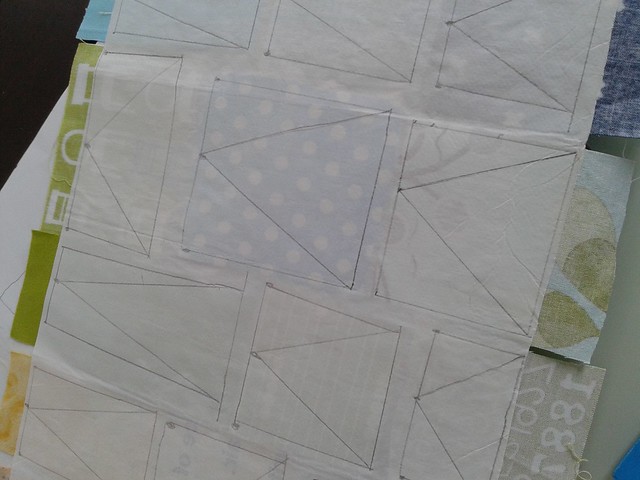
Then I drew triangles on the back of the paper and cut them out.

20151014_103916

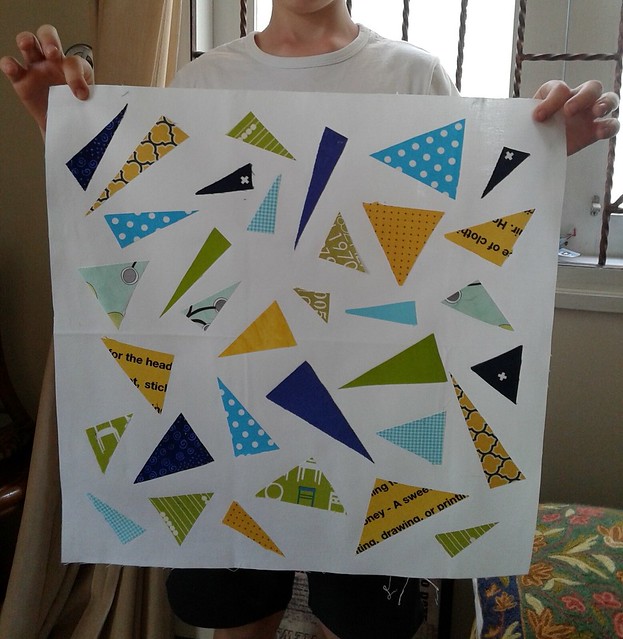
I arranged the triangles onto a white piece of fabric, and then we took the paper off the back of the triangles and ironed them so they stuck to the white fabric.

20151014_121235

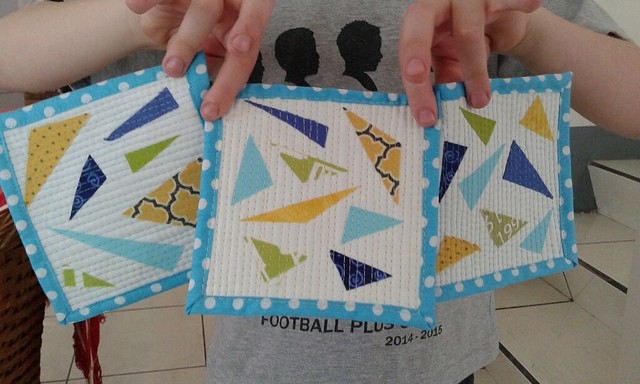
We then basted the quilt and I am now busy quilting it. I hope to have it finished soon so I can surprise my brother! But I did make some mini-mini quilts too with the left-over triangles so I can show you those. I am really excited that I have swapped these with other quilters.

2015-11-04_04-15-51

I am linking up with 'My DIY Block Design' at Blossom Heart Quilts


Wednesday, 28 October 2015

Teaching others to sew

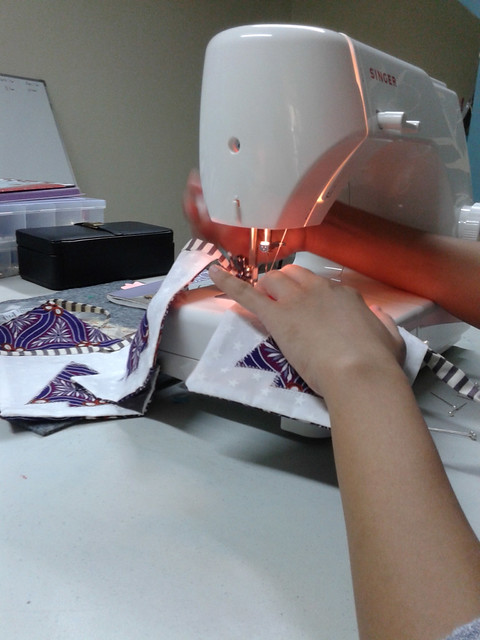
A friend of mine has recently set up a refuge for women rescued off the streets of our city. I can't share much about it, but it has been a real privilege to be able to teach some sewing skills to these ladies. 

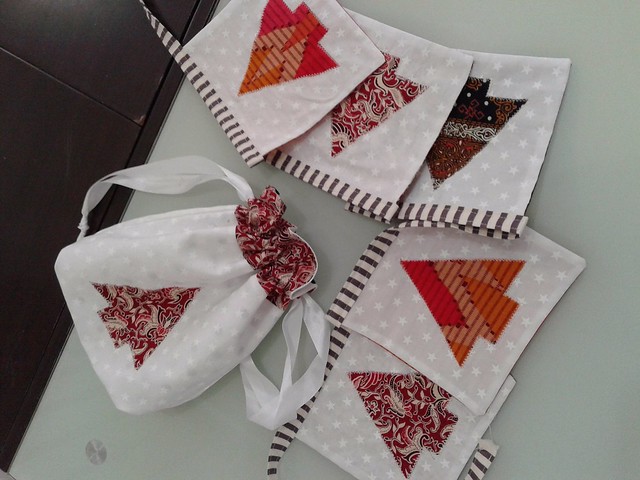
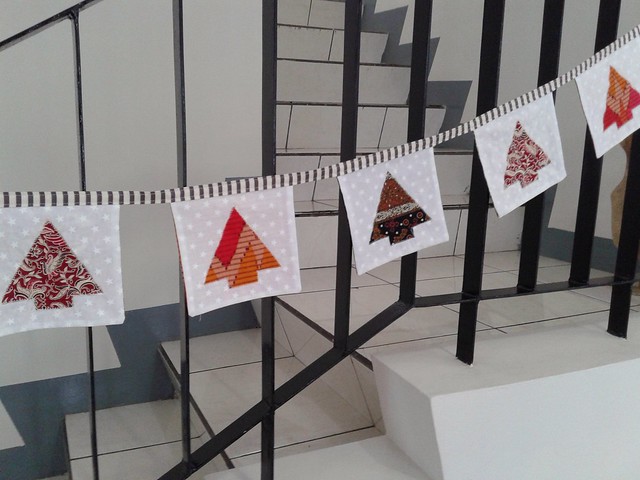
I was asked to help them make something that they could sell for Christmas. So after lots of thought I came up with the idea of some Christmas bunting with applique shapes, and matching drawstring bags. We have used Indonesian batik fabric to make them uniquely Indonesian.

2015-10-28_11-24-43

2015-10-28_11-27-07

The ladies got the hang of it pretty quickly, and were very proud of their efforts!

20151001_113543

I have a couple more projects (tissue holders and coasters) that I am going to teach them how to make in the next few weeks and then hopefully we can move on to bigger and more complex projects. 

I love that I have been able to use the skills that I have acquired over the last 3 years in order to help others work towards a new life. It has been a great reminder to me that happiness comes, not when we strive to fulfill our own dreams, but when we are able to love and bring joy to others. 

Linking up with 


Sunday, 18 October 2015

From the scrap basket

Or more realistically, from the huge scrap container! So many scraps, but I love all of them and I really enjoy sewing with them. I love searching through all the little pieces to find the perfect one for that moment. But it seems that they never even remotely get used up! 

If you follow me on Instagram you will see that I have been busy making more gifts, all from my scraps (and also doing some scraps sewing with Mr 8, but that's for another day).

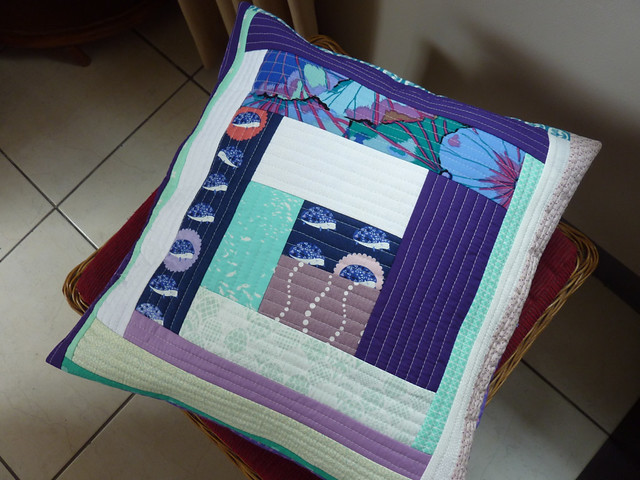
A pillow/cushion for a friend who loves hedgehogs and who is decorating her bedroom purple.

P1110945

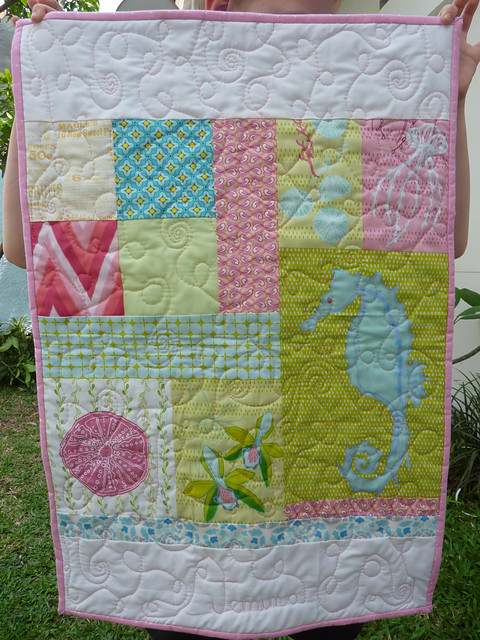
And a doll's quilt, which turned out a bit larger than expected!

P1110968

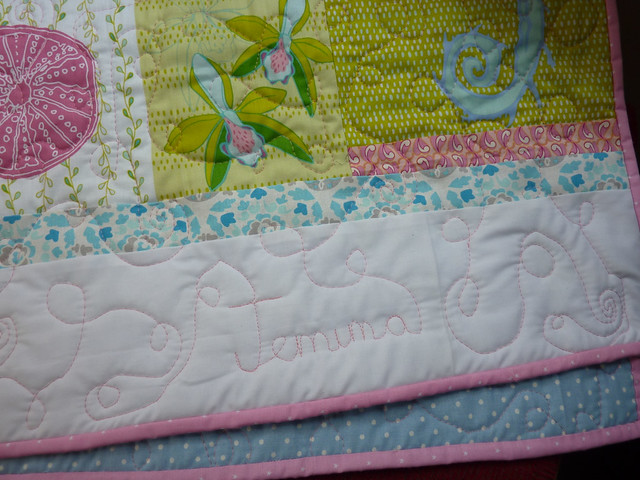
I especially loved experimenting with my FMQ on this one. And so fun to sew something pink and girly!

P1110969

Linking up with

Scraptastic Tuesday

Thursday, 8 October 2015

It's been a while!

I have been preoccupied with life, as well as some sewing, recently, and have neglected my little blog. 

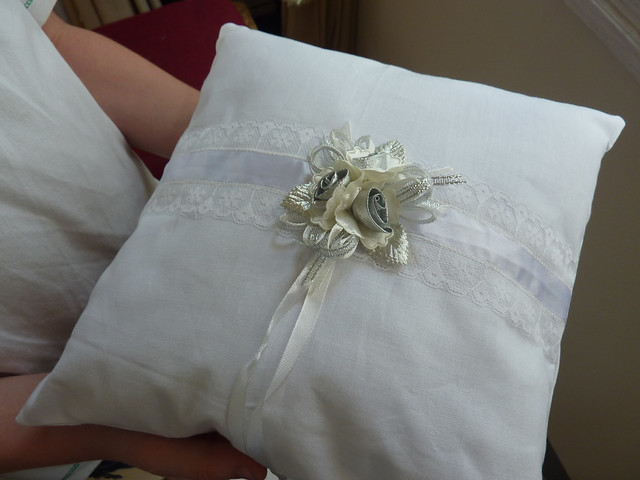
So a quick catch up. A friend (from the US) is getting married on Saturday. She asked me to make a ring pillow for the wedding. I honestly had to google what a ring pillow was, but once I saw a few examples it was all quite straightforward.

P1110926

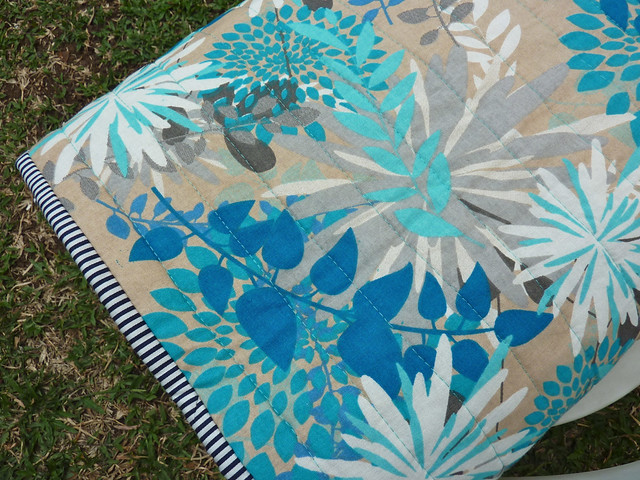
She had also told us (in her bridal shower invitation - another new experience for me!) what colour linens she wanted for each room in her house. I happened to be in Singapore when I received the invitation and during a quick trip to Spotlight I spotted the most perfect fabric for her living room (she had asked for cobalt blue and brown with an accent colour of turquoise!). So of course I had to buy it and made it into a whole-cloth lap quilt for her. 

P1110940

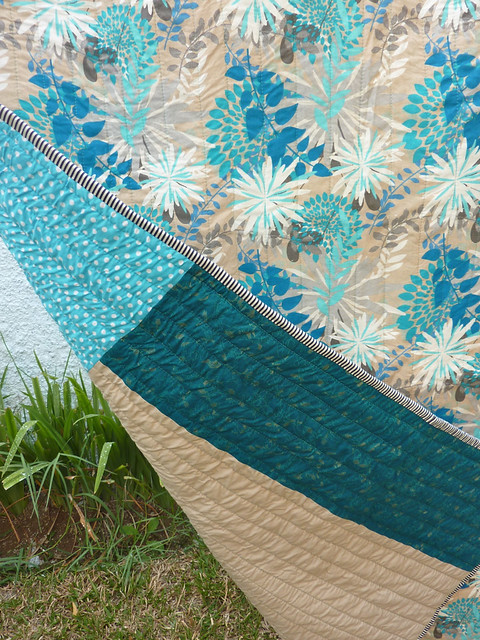
I made a pieced backing from my stash and used a striped binding - my favourite at the moment!

P1110938

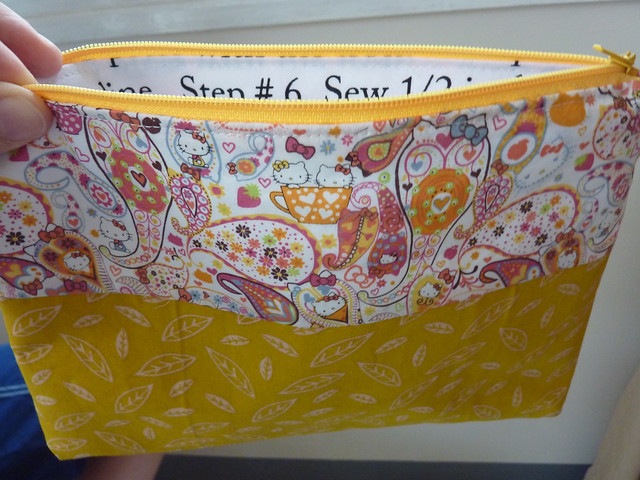
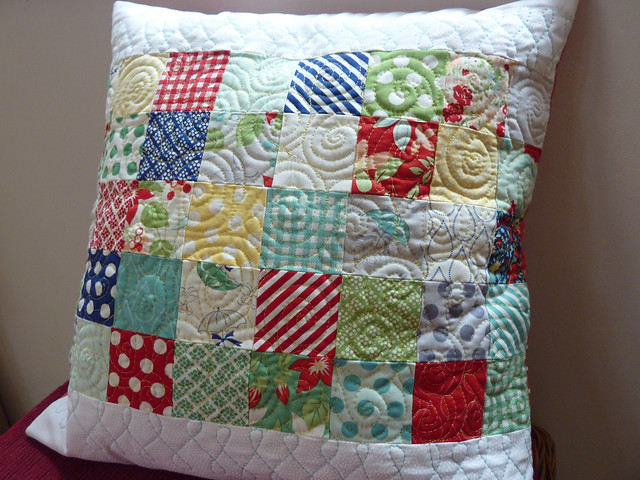
In non-wedding news, two of my best Indonesian friends had birthdays recently and I wanted to gift them something handmade. I decided on a second Hello Kitty zippered pouch, and a cushion/pillow made using an April Showers mini-charm pack.

P1110927


P1110929


I used the cushion as an excuse to practice my very rusty FMQ using yellow and teal Aurifil threads. This was the first time I have tried FMQ on my Juki and it was so much easier than on my old machine. I think the speed control really really helped!

I am really itching to get working on a quilt now,  just a few more smaller projects to finish first!

Wednesday, 9 September 2015

Presents galore!

The birthdays don't seem to stop! One day I will have to admit defeat and start buying some birthday presents, but in the meantime, I keep sewing!


First up, a tote bag using an awesome Cat & Vee Panel. You can't really see the writing under the penguins, but it says 'We are family. I got all my sisters with me'. For the back of the bag I made a QAYG panel the same size as the front, and then just put them together with a lining into a simple, but large and useful tote. This was a 50th birthday present for a friend who walks alongside me here in this cross-cultural life I lead!

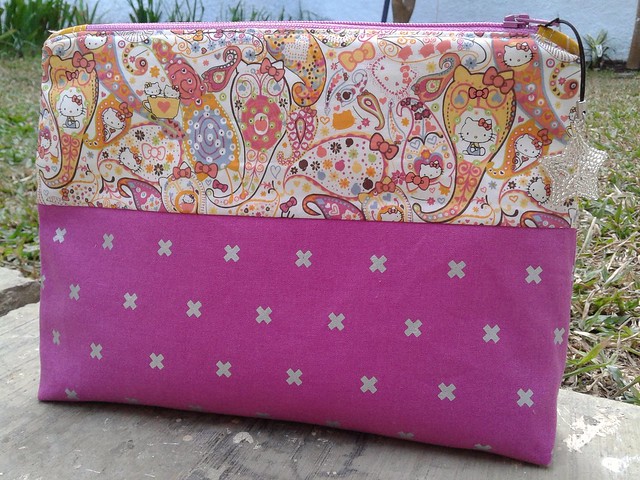
Next a present for a friend who adores Hello Kitty, and who appreciates the value of Liberty of London fabric. 

2015-09-08_09-10-07

The awesome Hello Kitty Liberty fabric came from Japan, thanks to Alyce going shopping for me! I used a great tutorial from VeryBerryHandmade for this flat-bottomed zipper pouch and have already cut out some fabric to make another one!

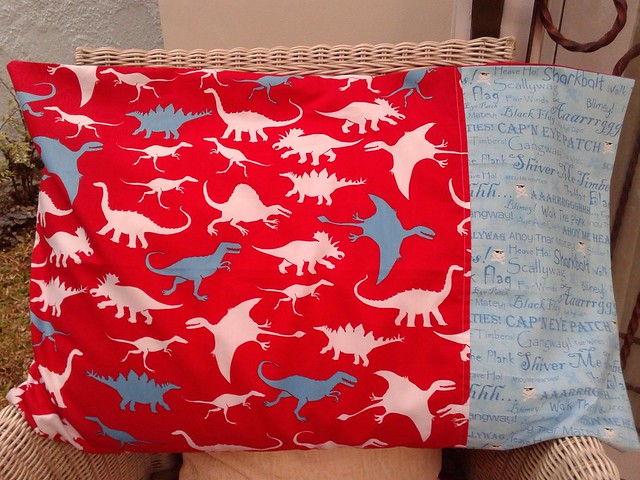
Finally, a present for a 6 year old boy who knows everything there is to know about dinosaurs! I spied this brilliant fabric at Spotlight in Singapore recently, and I know that dinosaurs and pirates don't really go together, but my sons thought it was fun!

2015-09-08_08-49-10

2015-09-08_08-51-21

For the pillowcase I used a super easy tutorial from Strawberry Patch Ramblings, and the drawstring bag is of course from In Color Order.

Linking up with 

Sew Cute Tuesday

Monday, 17 August 2015

Ho, Ho, Ho and on We Sew, tutorial and giveaway!

P1110852

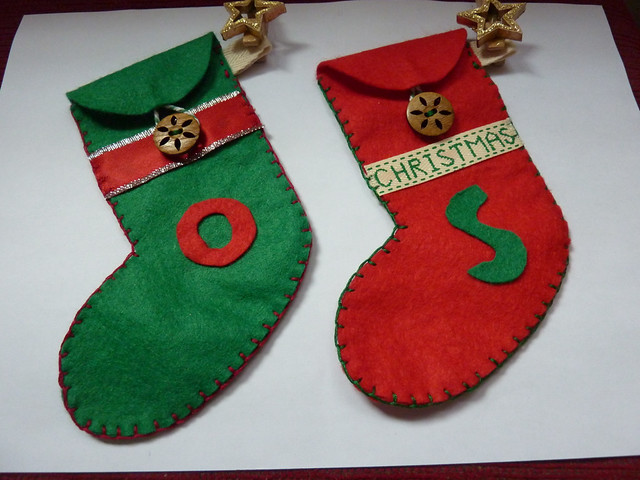
Thanks for stopping by for this month's tutorial on 'Ho, Ho, Ho and on we Sew' hosted by Fiona and Paula. Christmas is always a time of year when the kids and I enjoy making hand made gifts for friends and family. A couple of years ago we made these fantastic Christmas lollipop nose critters for their school friends.  I thought it would be fun for us to make something else small that could easily be handed out as end-of-year presents at school, and that kids can make (either with you or by themselves depending on their age).

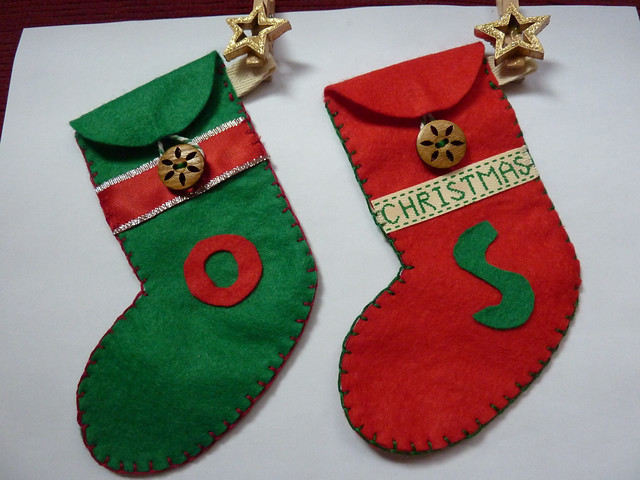
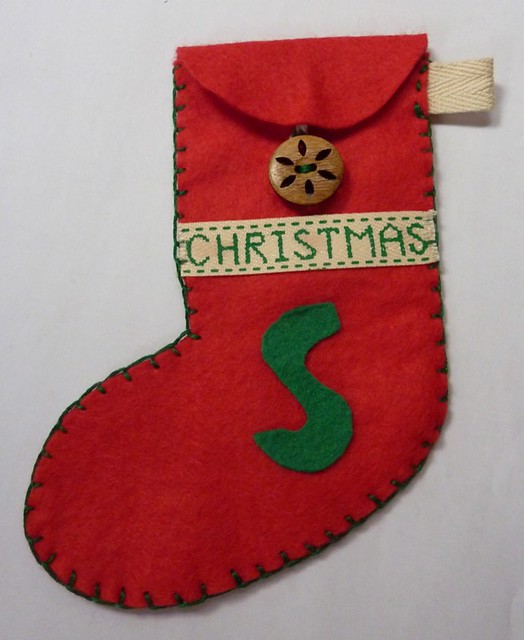
Introducing...The Envelope Christmas Stocking!

P1110848

Made from felt, only takes an hour or so to make, can be decorated to suit all tastes, and the envelope flap at the top will prevent the goodies inside from falling out!


P1110819
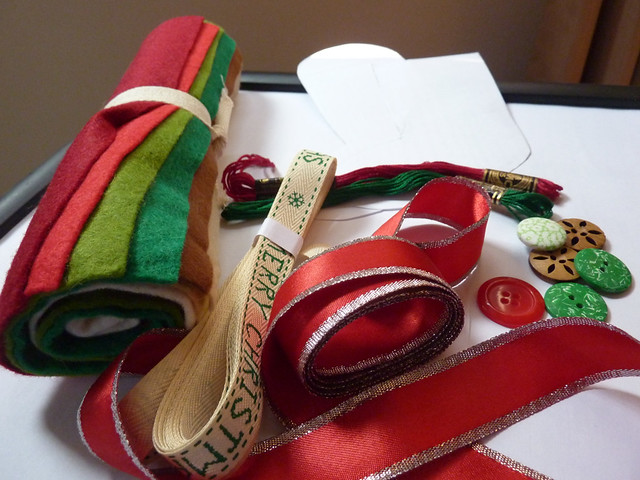
Materials needed:
Wool felt
Ribbon
Twill tape
Buttons
Embroidery floss
Craft glue
Elastic or twine


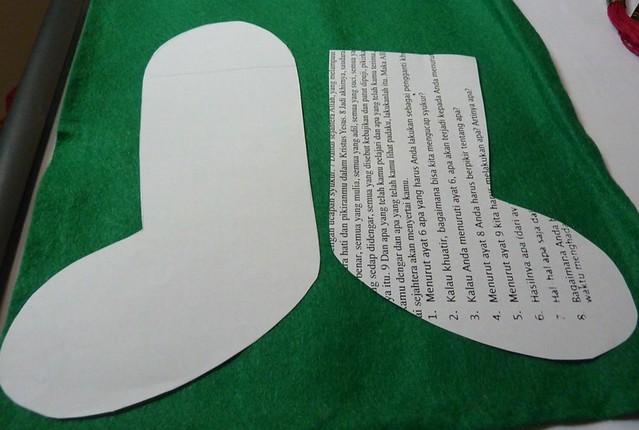
1. Draw your stocking template onto paper or cardboard. Cut out and then trace around it again (this time you want the mirror image, so flip your initial template over) for the template for the back of the stocking. Before you cut out this second template draw a half circle shape onto the top of it. This will become the envelope flap.

P1110821

2.  Place your templates onto the wool felt, draw around them and cut out the felt shapes. 

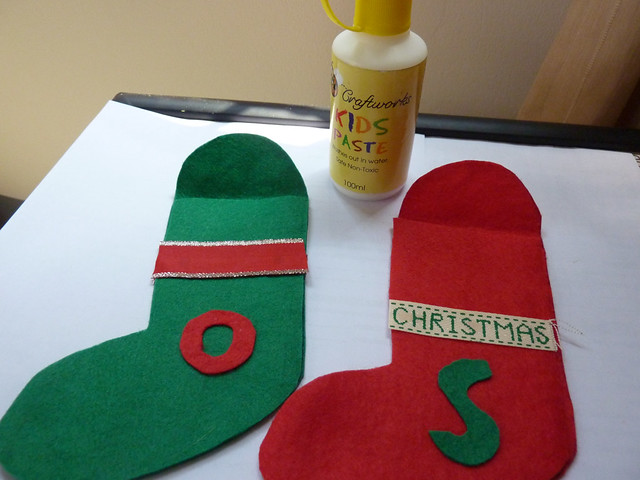
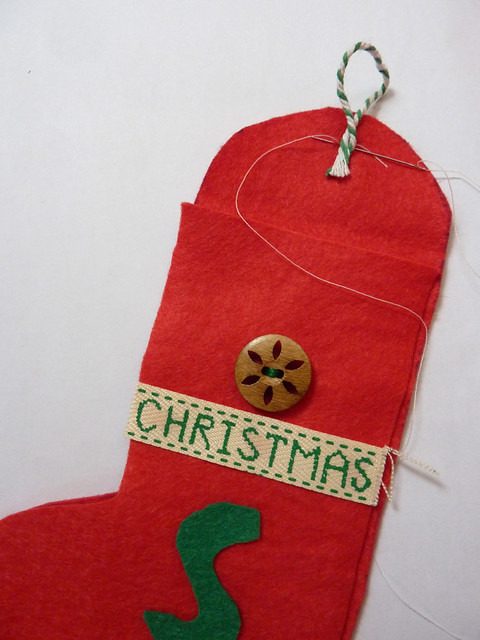
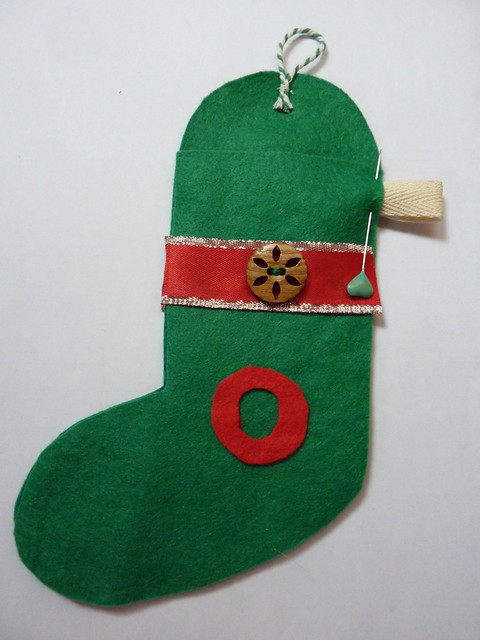
3. Decide on how you are going to decorate your stockings, keeping in mind that the top flap will be folded over, so leave some space for this. Using craft glue, glue on any ribbon or felt shapes that you are using. As these will be presents for school friends we decided to include the first letter of their names.

P1110828

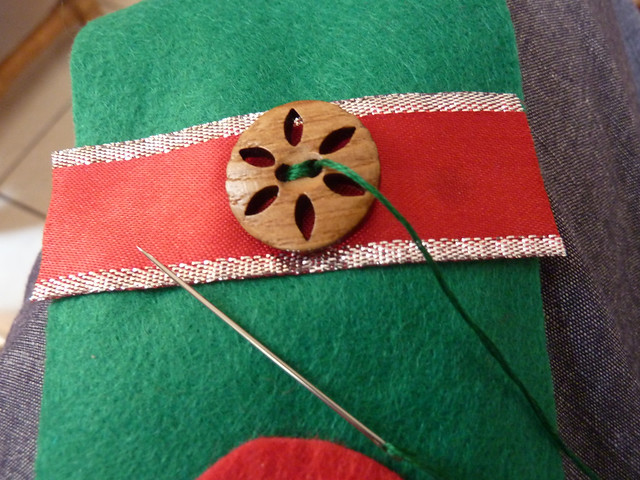
4. Hold the envelope flap down and then sew on your buttons in the correct place using some embroidery floss. 

P1110834

5.  Use a hair elastic or some twine to create the loop for the button closure. Sew this onto the inside of the flap, being careful not to let your stitches show through on the other side. The felt is quite thick so this is fairly easy. 

P1110839

 6. Line up the front and the back of your stocking, and pin a loop of twill tape in place (this is for hanging the stocking when it is finished).

P1110842

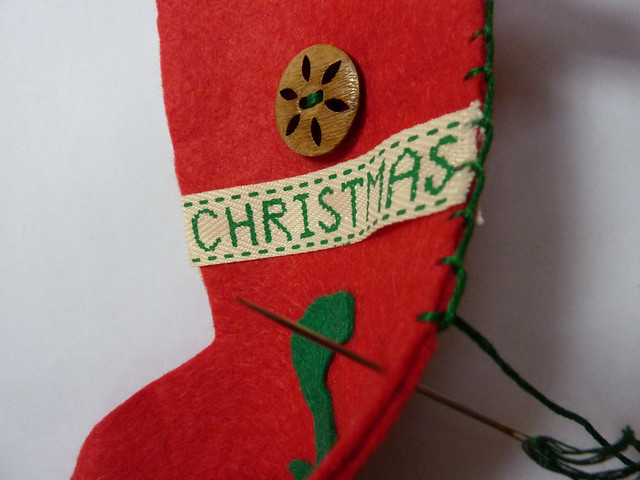
 7. Using embroidery floss and blanket stitch (I used this tutorial to remind me how to sew blanket stitch), sew the front and the back of your stocking together. Note that you will need to sew a couple of stitches of running stitch first through the twill tape, and then start on the blanket stitch. 

P1110844

8. Fill your stockings with whatever small gifts you would like and let your children gift them to their friends! I think chocolate and candy canes will be going in ours!

P1110857

 Now it's your turn to link up any Christmas/holiday makes that you have made this month. This month's giveaway is sponsored by The Village Haberdashery. The winner will receive a £10 gift voucher.

To enter the giveaway put your project on the link-up below. 
As usual we want to say a huge thank-you to all the sponsors who have provided wonderful prizes this year. It is not too late to start creating gifts for Christmas!


Crafty Trimmings

http://www.patchworkelephant.com/


Logo Sew Hot


Plush Addict Logo


Quilting Fabric at the Fat Quarter Shop

Tuesday, 11 August 2015

Flying chickens!

Another friend leaving, another gift needed as a token of thankfulness for a friendship that has been a sweet blessing. 

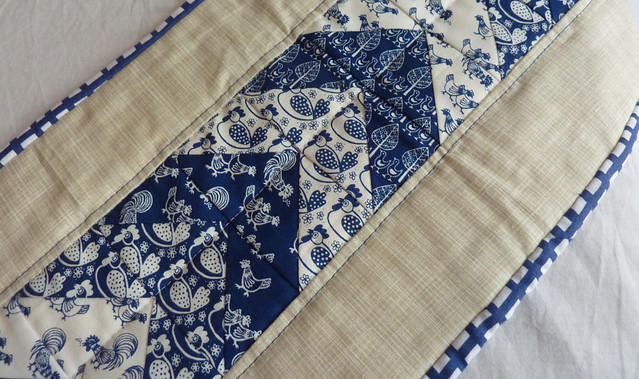
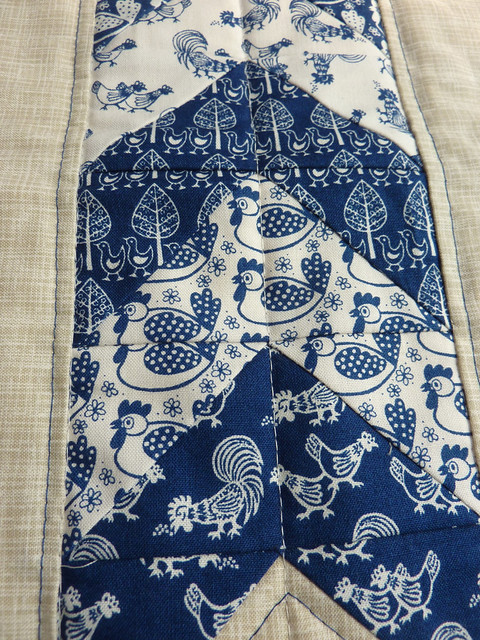
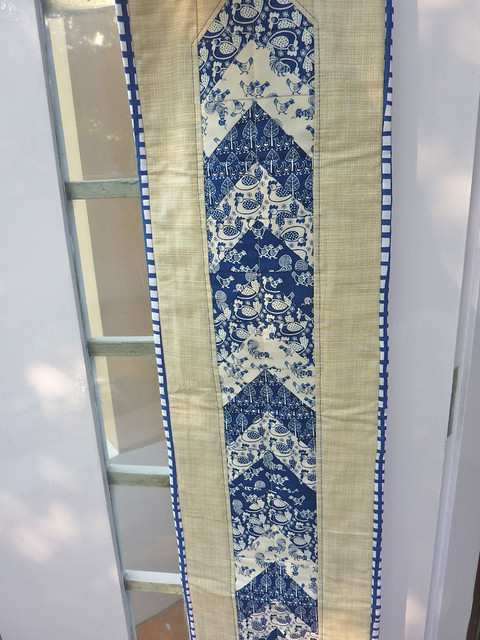
'Sew Organised for the Busy Girl' by Heidi Staples has become my go-to book for gifts recently. This time I chose the Chevron Table-runner and pulled some fabric that I knew my friend would enjoy, as she had gifted it to me!

P1110769

This was my first time making flying geese and I was surprised by how well they turned out! I think just about all my points survived!


I had an issue quilting with my navy 50wt Aurifil thread - it just didn't form great stitches as compared to my standard Aurifil 50wt 2600.  Has anyone else had this issue before with different colours of Aurifil? 

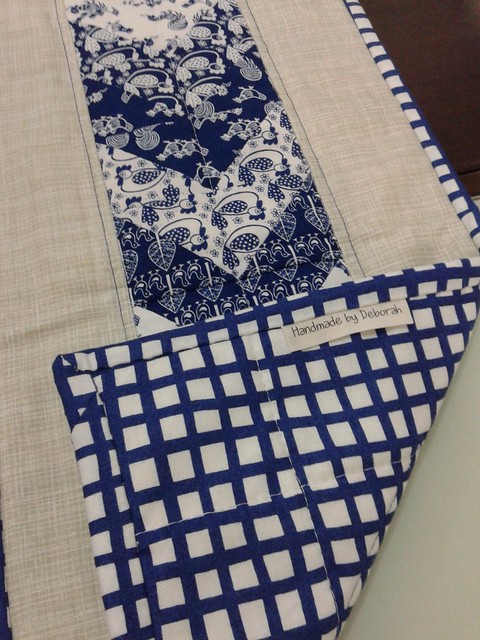
For the back and binding I used a Lotta Jansdotter Glimma fabric which I have been hoarding for a while!

20150807_214204

P1110771

Linking up with  

Sew Cute Tuesday

Friday, 24 July 2015

Go Anywhere Bag

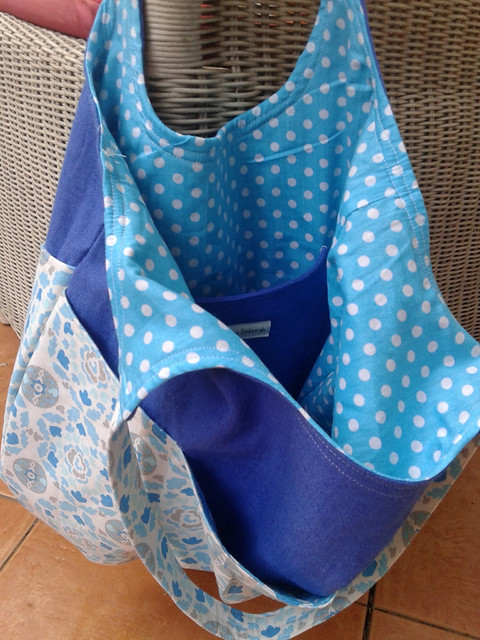
20150722_150035

A lovely friend has just returned to Indonesia after a year away. As it was her birthday a few days ago I decided to ask her what she would like me to make for her as a gift. Thankfully she didn't choose a King-sized quilt! She asked for a tote bag. Simple right? I think it is just my state of mind at the moment, but I could not decide on a design or pattern. Half the problem is that most bags require some sort of interfacing, and that is not readily available here. So I have to check whether I have in my stash what the pattern requires, or whether I can improvise.

20150722_150109

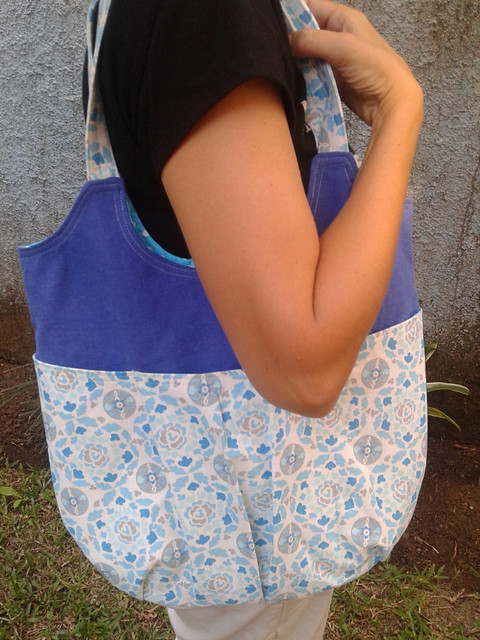
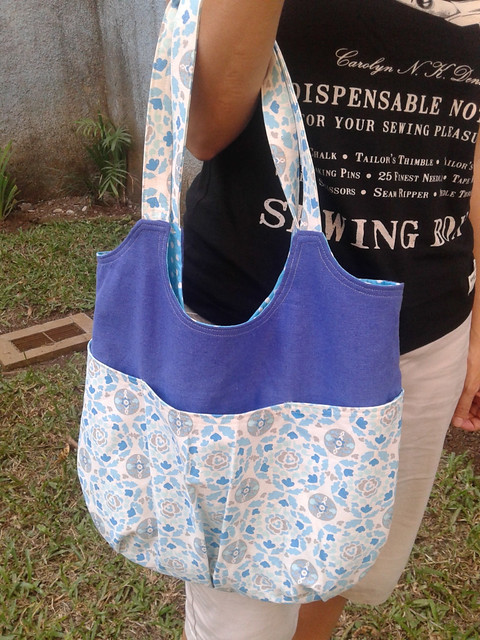
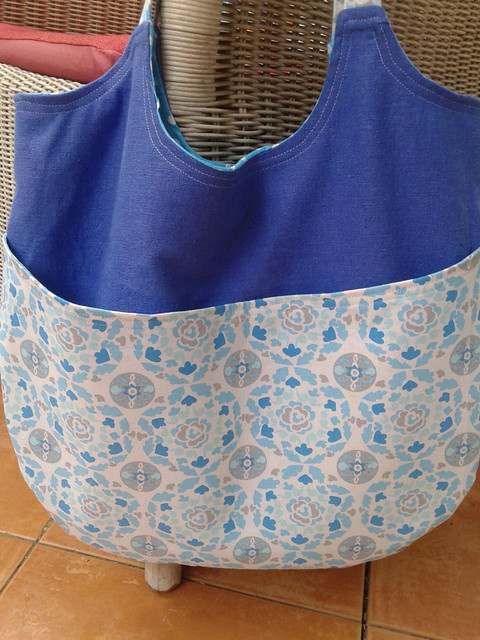
I finally decided on Noodlehead Designs 'Go Anywhere Bag'. Not your usual tote shape, but a large bag with lots of pockets, and not too complicated (I had seriously run out of time by this stage!). I chose some Dena designs linen blend fabric for the front and back pockets, and an open weave linen/cotton blend for the main section of the bag. I used a heavier weight interfacing for the pockets, and a medium weight interfacing for the main section (heavier weight would have been better for this but I had run out!). I skipped the magnetic snaps and just used some velcro on the large back pocket and left the main section of the bag open.

20150722_152001

Once all the pieces had been cut and interfaced, this bag came together really quickly, and the pattern was very easy to follow. I love the polka dots I used for the lining, and even remembered to add my label to the inside pocket!


 The main thing I will watch out for next time round is to get the back and front pockets lined up better, but it is hardly noticeable, and my friend was really happy with it.

Linking up with TGIFF and Finish It Friday.